こちらの続き
前回までで基本的な環境構築はできているので、
この記事はVueの内容がメインになるかと思います。
「Options API」と「Composition API」
ちょっと本筋からズレちゃいますが、実装を試していく上でハマったので、
Options APIとCompositon APIの書き方の違いについて触れたいと思います。
前の記事でLIFFの開発環境を構築した際は以下のように、
Options APIでソースが生成されていました。
(sendMessagesの部分だけ前回の記事で追加しています)
src/App.vue
<script>
  import liff from "@line/liff";

  export default {
    data() {
      return {
        message: "",
        error: ""
      };
    },
    mounted() {
      liff
        .init({
          liffId: import.meta.env.VITE_LIFF_ID
        })
        .then(() => {
          this.message = "LIFF init succeeded.";

          alert(liff.getContext());

          liff
            .sendMessages([
              {
                type: "text",
                text: "Hello, World!",
              },
            ])
            .then(() => {
              alert("message sent");
            })
            .catch((err) => {
              alert("error", err);
            });
        })
        .catch((e) => {
          this.message = "LIFF init failed.";
          this.error = `${e}`;
        });
    }
  };

</script>

<template>
  <div>
    <h1>create-liff-app</h1>
    <p v-if="message">{{ message }}</p>
    <p v-if="error">
      <code>{{ error }}</code>
    </p>
    <a href="https://developers.line.biz/ja/docs/liff/" target="_blank" rel="noreferrer">
      LIFF Documentation
    </a>
  </div>
</template>

<style>
#app {
  font-family: Avenir, Helvetica, Arial, sans-serif;
  -webkit-font-smoothing: antialiased;
  -moz-osx-font-smoothing: grayscale;
  text-align: center;
  color: #2c3e50;
  margin-top: 60px;
}
</style>
これは古い書き方っぽくて現在のトレンドはCompositon APIだそうなので、
以下のように修正します。
<script setup>
  import liff from "@line/liff";
  import { ref, onMounted } from "vue";

const message = ref("");
const error = ref("");

  onMounted(
    function() {
      liff
      .init({
        liffId: import.meta.env.VITE_LIFF_ID
      })
      .then(() => {
        message.value = "LIFF init succeeded.";

        liff
          .sendMessages([
            {
              type: "text",
              text: "Hello, World!",
            },
          ])
          .then(() => {
            alert("message sent");
          })
          .catch((err) => {
            alert("error", err);
          });

        })
      .catch((e) => {
        message.value = "LIFF init failed.";
        error.value = `${e}`;
      });
      console.log('message:' + message);
      console.log("error:"+error);
    }
  )
</script>

<template>
  <div>
    <h1>create-liff-app</h1>
    <p v-if="message">{{ message }}</p>
    <p v-if="error">
      <code>{{ error }}</code>
    </p>
    <a href="https://developers.line.biz/ja/docs/liff/" target="_blank" rel="noreferrer">
      LIFF Documentation
    </a>
  </div>
</template>

<style>
#app {
  font-family: Avenir, Helvetica, Arial, sans-serif;
  -webkit-font-smoothing: antialiased;
  -moz-osx-font-smoothing: grayscale;
  text-align: center;
  color: #2c3e50;
  margin-top: 60px;
}
</style>
コードの量が減り見やすくなりました。
この状態で後続に進みます。
子コンポーネントを使用
Vueではパーツごとにコンポーネントという単位でファイルを分けて、
必要に応じて取り込めるということなので、一旦子コンポーネントを作成して表示します。
src配下にcomponentsというフォルダを作成して、
components配下に、CustomTextArea.vueというファイルを以下のように作成します。
<script setup>
const props = defineProps({
  'name': String,
  'value': String
})
</script>

<template>
  <p>{{props.name}}</p>
  <input type="text" v-bind:value="value">
</template>
次にApp.vueを以下のように変更します。
<script setup>
  import liff from "@line/liff";
  import CustomTextArea from "./components/CustomTextArea.vue";
  import { ref, onMounted } from "vue";

const message = ref("");
const error = ref("");

  onMounted(
    function() {
      liff
      .init({
        liffId: import.meta.env.VITE_LIFF_ID
      })
      .then(() => {
        message.value = "LIFF init succeeded.";

        liff
          .sendMessages([
            {
              type: "text",
              text: "Hello, World!",
            },
          ])
          .then(() => {
            alert("message sent");
          })
          .catch((err) => {
            alert("error", err);
          });

        })
      .catch((e) => {
        message.value = "LIFF init failed.";
        error.value = `${e}`;
      });
      console.log('message:' + message);
      console.log("error:"+error);
    }
  )

</script>

<template>
  <div>
    <h1>create-liff-app</h1>
    <p v-if="message">{{ message }}</p>
    <p v-if="error">
      <code>{{ error }}</code>
    </p>
    <a href="https://developers.line.biz/ja/docs/liff/" target="_blank" rel="noreferrer">
      LIFF Documentation
    </a>
  </div>
  <section>
    <CustomTextArea
      name="test1"
      value="tttttttt" />
  </section>
</template>

<style>
#app {
  font-family: Avenir, Helvetica, Arial, sans-serif;
  -webkit-font-smoothing: antialiased;
  -moz-osx-font-smoothing: grayscale;
  text-align: center;
  color: #2c3e50;
  margin-top: 60px;
}
</style>
import文の追加と「<CustomTextArea 〜/>」というタグの追加です。
画面遷移
Vueの機能を使用して、ルーティング機能を追加しようと思います。
URLごとに表示するコンポーネントを出し分けることで画面遷移を実装していきます。
vue-routerをインストールします。(公式サイトはこちら)
$ npm install vue-router@4インストールできたら、main.jsと同じ階層にrouter.jsを作成します。
import { createWebHistory, createRouter } from 'vue-router';

import Test1 from './views/Test1.vue';
import Test2 from './views/Test2.vue';


const routes = [
  {
    path: '/',
    name: 'Test2',
    component: Test2,
  },
  {
    path: '/test1',
    name: 'Test1',
    component: Test1,
  },
  {
    path: '/test2',
    name: 'Test2',
    component: Test2,
  },
]

const router = createRouter({
  history: createWebHistory(),
  routes,
})

export default router;
そして、同じ階層にviewsというフォルダを作成して、その中にTest1.vue、Test2.vueを作成します。
<script setup>
  const props = defineProps({
    'name': String,
    'value': String
  })
</script>

<template>
  test1です
  <p>{{props.name}}</p>
  <input type="text" v-bind:value="value">
</template>
<script setup>
const props = defineProps({
'name': String,
'value': String
})
</script>
<template>
test2です
<p>{{props.name}}</p>
<input type="text" v-bind:value="value">
</template>中身は前回使用したvueファイルをコピーしただけで「test1です」「test2です」という文言だけ追加してます。
続いてmain.jsを修正
import { createApp } from 'vue';
import App from './App.vue';
import router from './router.js';

createApp(App)
  .use(router)
  .mount('#app');
router.jsを使用できるようにします。
App.vueも修正
<script setup>
  import liff from "@line/liff";
  import CustomTextArea from "./components/CustomTextArea.vue";

  import { ref, onMounted } from "vue";
  import { RouterView, RouterLink } from "vue-router";

const message = ref("");
const error = ref("");

  onMounted(
    function() {
      liff
      .init({
        liffId: import.meta.env.VITE_LIFF_ID
      })
      .then(() => {
        message.value = "LIFF init succeeded.";

        liff
          .sendMessages([
            {
              type: "text",
              text: "Hello, World!",
            },
          ])
          .then(() => {
            alert("message sent");
          })
          .catch((err) => {
            alert("error", err);
          });

        })
      .catch((e) => {
        message.value = "LIFF init failed.";
        error.value = `${e}`;
      });
      console.log('message:' + message);
      console.log("error:"+error);
    }
  )

</script>

<template>
  <div>
    <h1>create-liff-app</h1>
    <p v-if="message">{{ message }}</p>
    <p v-if="error">
      <code>{{ error }}</code>
    </p>
    <a href="https://developers.line.biz/ja/docs/liff/" target="_blank" rel="noreferrer">
      LIFF Documentation
    </a>
  </div>
  <section>
    <CustomTextArea
      name="test1"
      value="tttttttt" />
  </section>
  <section>
    <RouterLink to="/test1">リンクテスト</RouterLink>
  </section>
  <section>
    <RouterLink to="/test2">リンクテスト2</RouterLink>
  </section>
  <section>
    <RouterView />
  </section>
</template>

<style>
#app {
  font-family: Avenir, Helvetica, Arial, sans-serif;
  -webkit-font-smoothing: antialiased;
  -moz-osx-font-smoothing: grayscale;
  text-align: center;
  color: #2c3e50;
  margin-top: 60px;
}
</style>
修正箇所としてはRouterView, RouterLinkのimport追加
「<RouterLink to=></RouterLink>」でリンク追加
「<RouterView />」でリンクをタップした場合の表示領域の作成です。
画面表示します。まずは「<liff url>/」
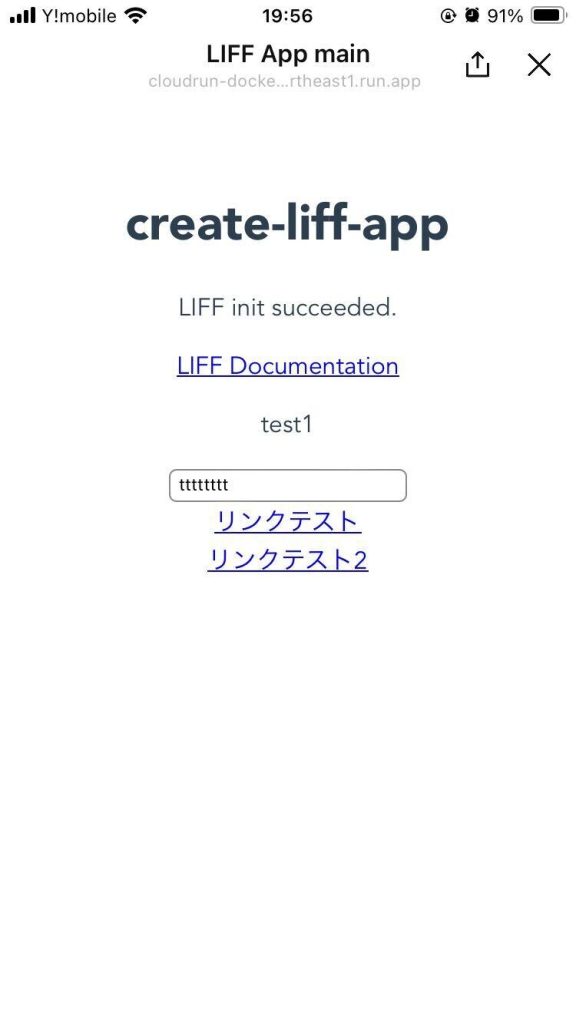
「リンクテスト」「リンクテスト2」というリンクが追加されています。
続いて、リンクテストをタップ
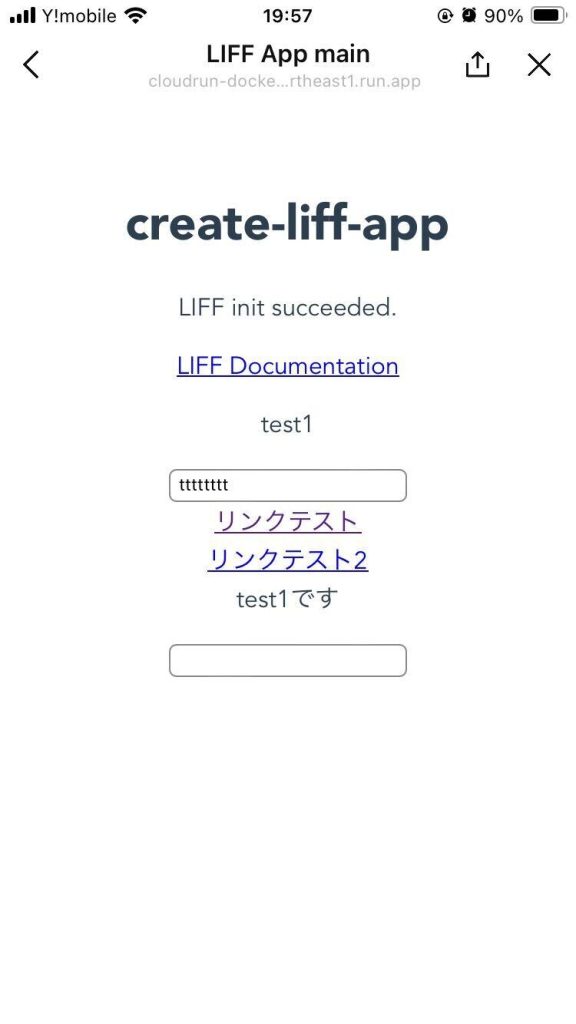
test1ですという文言などが表示されます。
続いてリンクテスト2をタップ
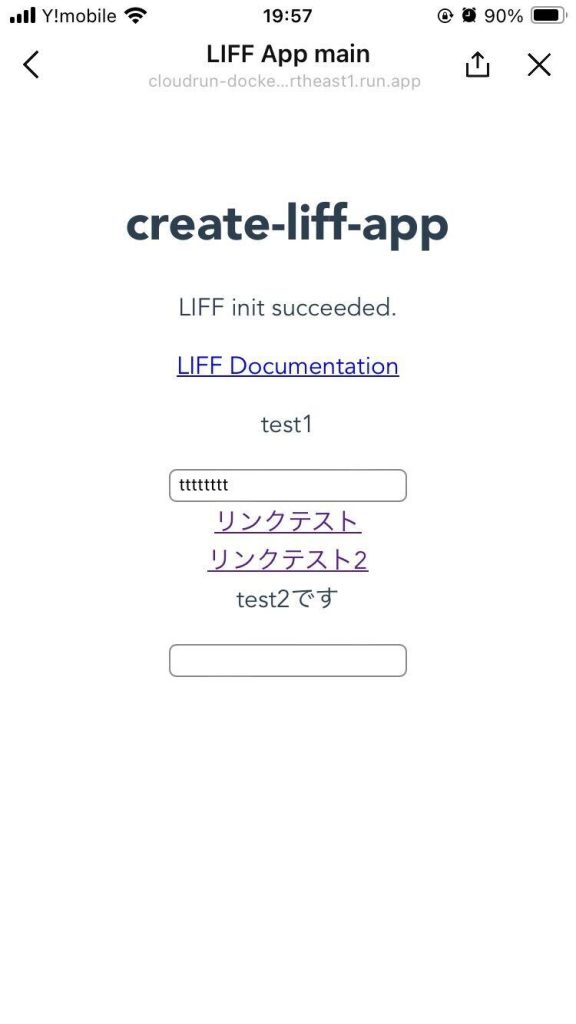
test2ですの表示に切り替わりました。
「LIFF×Vue×Flask×Cloud Runアプリ実装(LINEアプリ)②」への5件のフィードバック